
Running Man LXXXVIII Viewing Party

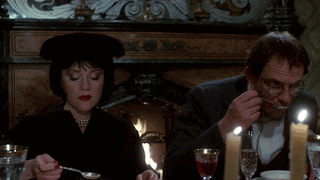
February brought the Super Bowl and along with it, another highly-anticipated nationally-televised sporting event, The Running Man! Our movie night happened to fall the day before the Super Bowl, and since the film is about this highly viewed tv show, I decided that our theme would be a Super Bowl style viewing party. I asked guest to bring sharable dishes that we could all enjoy. One person brought wings, one brought pizza, one made pot stickers, and a couple more brought some chips and dips. We had a pretty decent spread of options by the time everything was said and done. Another benefit of doing the food this way is that it was less work on me to prepare or cook everything. Instead, I was able to focus my attention on dessert.
If you are not familiar with this film, The Running Man is a dystopian action film set in the distant future between 2017 to 2019. It features Arnold Schwarzenegger who is framed and falsely imprisoned by the state. The government uses lies and propaganda to manipulate and control the populace who are struggling to survive. One way that they do this is through television, and their most popular show is The Running Man. On this reality style game show, convicts are given the opportunity to fight for their freedom in a series of gladiator style matches between themselves and champions known as "stalkers." These stalkers each have their own unique gimmick and persona, similar to modern wrestling. There are five stalkers that appear in the film: Professor Subzero (who dresses and fights as a hockey player), Dynamo (who is an opera singer that shoots lightning from his electrical suit), Buzzsaw (who fights with a chainsaw sharp enough to cut through steel), Fireball (who uses a flamethrower and jetpack), and Captain Freedom (who fights with his bare hands and the power of America).

To embrace the idea that we were just fans getting ready to watch the big game, as a pre-movie activity I set out poster boards, colored sharpies, and scissors on my coffee table so that guests could make signs and props to cheer on their favorite stalkers. I bought regular poster board and also foam board. Everyone gravitated to the foam board which is thicker and more tactile. It's also great to cut out fun shapes. In the movie, whenever an audience member was choosing the next stalker to send out, we would wave our homemade signs and root for our guy. This added a little fun and whimsy to the evening, so if you were to do your own Running Man viewing party, I would recommend incorporating this.
For dessert, I decided that I wanted to make something that was connected to the film. While planning this event, I asked my mother what kind of food people typically bring to Super Bowl parties. This may surprise you, but football isn't really my thing so I don't have a lot of experience in this area. After talking for a minute, she mentioned that sometimes people make things that are tied to the game, like football shaped cookies or something. This gave me the idea that I could try to make snacks or desserts that were connected to the legendary stalkers.


Ultimately, what I ended up doing was buying some pop rocks style candy that was meant to be an homage to Dynamo, a strawberry and blueberry tart that was supposed to be a reference to Captain Freedom because of its patriotic colors, and lastly, I made some homemade mint ice cream bars in the shape of hockey pucks for Professor Subzero. (Recipe below) I also bought a liter of Fireball, which many of us enjoyed taking shots of throughout the night.
Professor Subzero's Hockey Puck Mint Ice Cream Bars

For these hockey puck ice cream bars, I used mint ice cream because mint flavor is often associated with icy coldness and I wanted to lean into that aspect of the Subzero character. For this recipe, I used fresh mint leaves that I grew myself in my Gardyn 3.0, a hydroponic gardening system that I bought a couple months ago because I don't already have enough hobbies and distractions to occupy my time. Hahaha
In the original recipes that I took inspiration from, they used 2 cups of mint leaves and strained the leaves out before making the ice cream. For my harvest, I was only able to gather a half cup of fresh leaves while leaving enough for the plant to continue to grow. Because I didn't have as much mint, I decided not to strain the leaves and to leave them in the ice cream. This packed an extra punch of mint as the leaves themselves were still very full of flavor.
For this recipe, you could make the ice cream in an ice cream maker, but I don't have one of those, so I used a different technique that uses only an electric mixer and your kitchen freezer. I first learned this trick when making the ice cream balls for the Goonies and it has worked very good for me.
I spent two days making this and would suggest that you do the same.
Ingredients:
1 bag of melting dark chocolate (approximately 12 oz)
1 cup whole milk
3/4 cup sugar
1/2 cup fresh mint leaves
2 cups heavy whipping cream
Equipment:
pot and metal bowl for double boiler setup
disk shaped rubber molds (This recipe will make 12 large disks. I used two mold trays that each fit six.)
electric mixer
spatulas
Directions:
- Melt your chocolate, stirring regularly. If you are not familiar with the double boiler technique it is one that I use every time I melt chocolate because it keeps the chocolate from burning. To do this, put water into an ordinary pot and put the temperature to a medium-high. The water doesn't need to boil, but you do need steam. Set a metal bowl that is larger than the pot on top of the pot. The bottom of the bowl should not be in the water, so if you have too much water, pour some out. The idea is that the bowl will be heated by the steam produced and that will in turn melt the chocolate.
- When the chocolate seems fully melted, brush it onto the bottom and sides of each disk mold. I used a small spatula for this. The coating does not need to be thick or even. The goal is just to not be able to see through it, so try to fill any holes that appear.

- Put your chocolate molds in the freezer. I put my molds on a baking sheet first. The rubber molds themselves are flimsy, so the baking tray keeps them level and makes them easier to move.
- Reduce your heat to medium or medium-low, dump your water, and set aside the bowl with the remaining chocolate. You will need the rest of this tomorrow. You can leave it setting out, but your should cover it.
- In the pot, add your milk and sugar. Stir. It should dissolve completely. The milk should be warm, but not simmering or boiling.
- Hand tear your mint leaves into small bite size pieces and stir them into your sugary milk.

- Let the mixture sit, stirring occasionally, until the leaves turn wilted. They wilt similar to spinach when they cook, so it's a good visual indicator that you're done. The goal is to release as much mint flavor into the milk mixture as possible. If you use more mint leaves than I did, you may also notice a color change.
- Take pot off heat and cover. Once it has cooled to near room temperature, put it in the fridge to leave overnight. Keep it covered.
- The next morning, it will be ready to turn into ice cream. Before we begin, put your kitchen mixing bowl in the freezer for a few minutes to chill just a bit.
- After it is nice and cold to the touch, take your mixing bowl and your mint milk out of the fridge and freezer.
- Pour the two cups of whipping cream into your chilled bowl and mix with your whisk attachment on the high setting. Soon, it will thicken and transform into a thick whipped cream. Continue to mix until you cream has nice stiff peaks. If you are not familiar with that term, all it means is that when points appear, the stay up, even if you were take the bowl out and move it around. You can think of peaks like the crest of ocean waves. Normally, waves last only a moment. Stiff peaks are like a photograph of the ocean. The waves stay right where they are. Don't over mix. Over mixing cream can create butter. Chilling the bowl the way we did help prevent that, but it could still happen if you let the mixer keep going longer than you need to.
- Once you have your stiff peaks, pour your mint milk mixture from yesterday into it. You may want to strain your mint leaves first, but I left them in for extra mint flavor.
- With a spatula, fold them together until you have an even mixture and consistency. You should end up with a light, foamy mixture that is wetter than the whipped cream but thicker that the milk. Not quite liquid or solid. Once it freezes, it will have the consistency of a light and fluffy ice cream.

- Take the chocolate molds out of the freezer. With the spatula, scoop out some ice cream mixture into each mold. Fill the cup but not to overflowing. We will be putting more chocolate on this later to seal and complete it. Try to avoid any peaks. We want the top to be near level.

- Return your ice cream concoctions to the freezer. You will need to wait several hours before attempting the next step, because we want to make sure the ice cream has solidified as much as possible. I waited until just an hour or two before my party to finish this.
- Once you feel like your ice cream has fully hardened, you need to start another double boiler to melt the remaining chocolate.
- Once the chocolate has fully melted, take your ice cream cups out of the freezer. With the spatula, scoop melted chocolate onto each cup and spread it out the edge. The goal is that this new layer of chocolate will connect to the chocolate that makes up the sides of each disk. As you brushing the chocolate, make your connect with the edges the whole way around. Some of your ice cream may melt when touching the heated chocolate. This can't be helped. Just do your best to cover each cup and leave no holes.

- When done, return ice cream bars to the freezer. They should be ready to serve by dessert time.
- When ready to serve, gently pop each hockey puck out of its mold and onto a serving tray. The benefit of using rubber molds is that this is easy to do. They are now ready to eat. Enjoy!


Overall, this event was big hit. The movie was fun, the signs that we made made it interactive, the ice cream hockey pucks were delicious and on theme, and even better I didn't have to cook a thing, which meant less stress and work for me. If you ever host a dinner party for this film, I would suggest trying many of the things that we did. If you have any suggestions on things that you would have done differently, put them in the comments.

Comments
Post a Comment